
27th May 2012
|
 |
Ceriwis Lover
|
|
Join Date: May 2012
Posts: 1,997
Rep Power: 17
|
|
 [HOT] Buat Windows Versi Sendiri dgn Nlite
Numpang ngeshare ilmu ya agan2 dan sista2
yang pasti kga  gan
bukti =
[/spoiler]
Spoiler for open this:
for bukti:

kga kan gan? 
Step by Step Customize Windows Via Nlite:
Pingin punya windows versi sendiri  ? Caranya mudah tinggal pake Nlite...
Berikut akan saia jelaskan step by stepnya, dari slipstreaming Service Pack, Install Software n Themes, dan tweaking.
Preparation Step:
-Pastikan anda punya CD / File Installan Windows, saia ngga ngeshare disini
-Download Nlite : -Download-
-Virtual PC bwt ngetes (optional)
-Software2 yg mau di tambahin ke windows installationnya
langsung aja ya gan
Spoiler for open this:
for step 1:
step 1
Browse ke Folder windows installation, kalau dari CD maka akan ditanya akan disimpan dimana filenya...
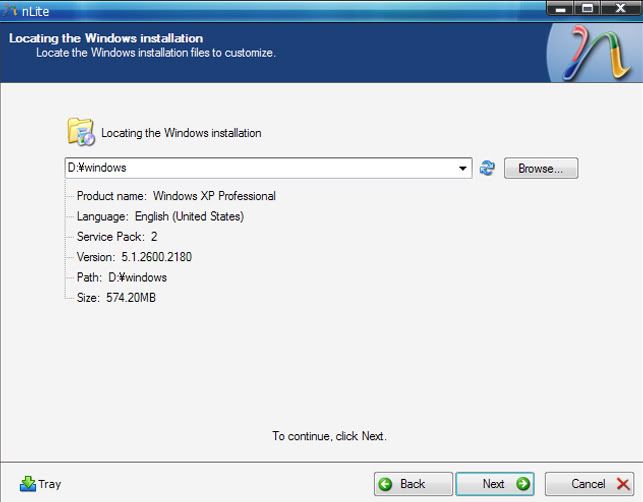
Disini saia pake Win XP SP 2
Spoiler for open this:
for step 2:
step 2
Layar Preset ( Settingan Nlite ) , kalau baru pertama kalinya, terobos aja...
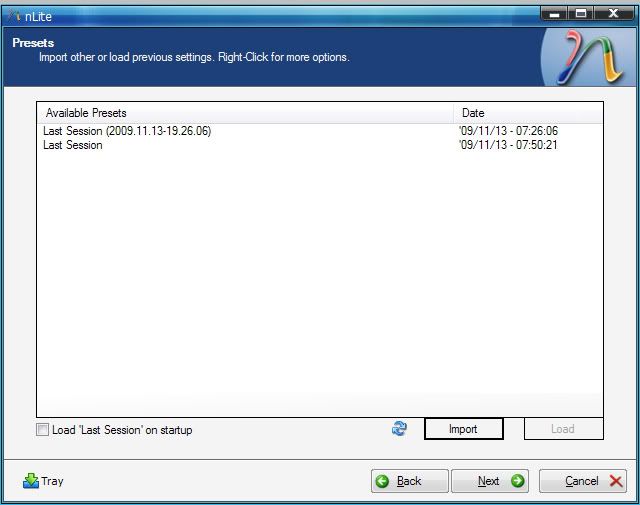
Spoiler for open this:
for step 3:
step 3
Klik di all, semua akan dicoba untuk kustom besar2an di sini
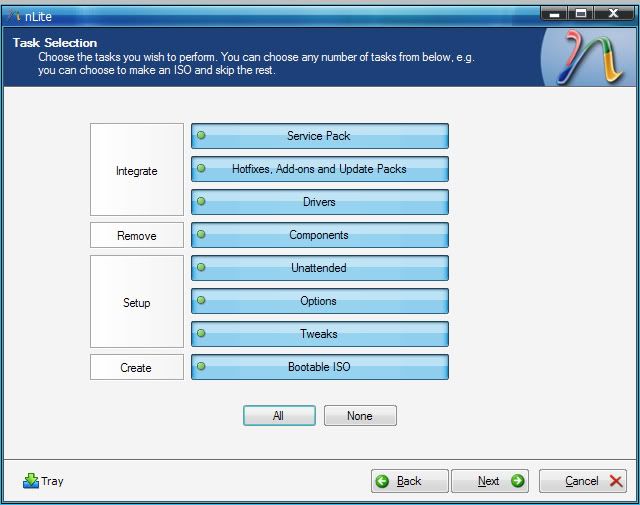
Spoiler for open this:
for step 4:
step 4
Slipstream Windows Service Pack disini...
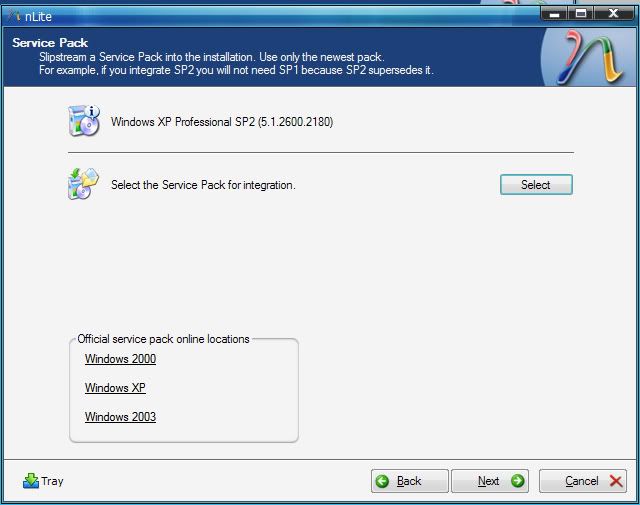
klik select n langsung aja browse ke file instalan SP3mu
Spoiler for open this:
for step 5a:
step 5a
Integrasikan software n patch, sayangnya ngga bisa file exe dari installannya langsung ... harus dari bentuk .cab
harus diconvert dlu, untuk sementara software2 yg ready bisa di download di sini -Download-
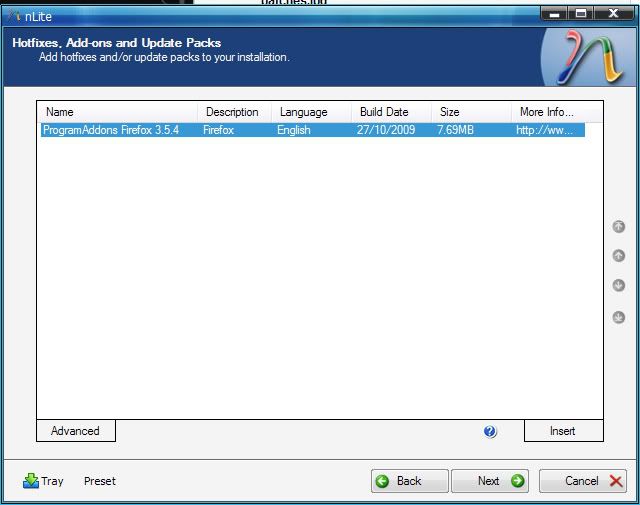
disini saia coba install firefox
Spoiler for open this:
for step 5b:
step 5b
Integrate driver yg km perlukan, saia ngga perlu sih..
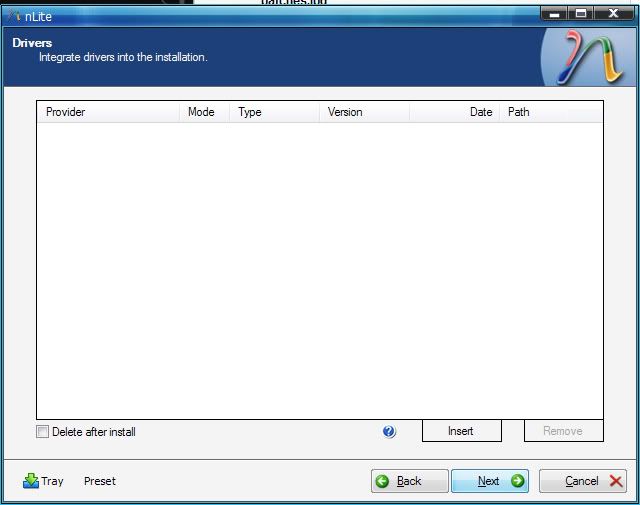
Spoiler for open this:
for step 6:
step 6
Layar Components, saatnya buang yang ngga perlu
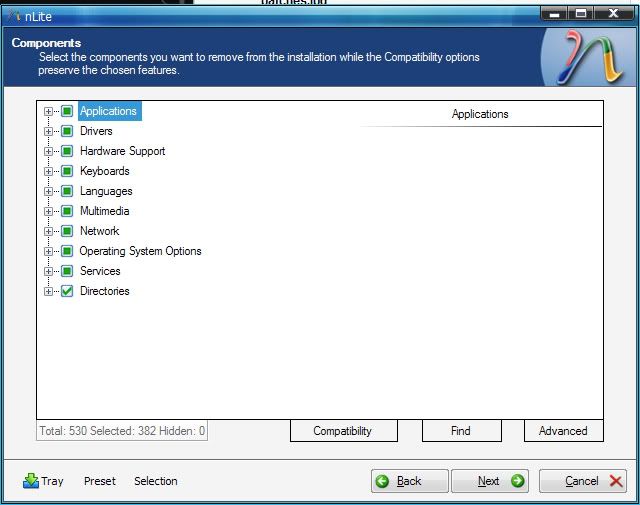
Kalau saia yg dibuang ini, tapi kreasikan sendiri sih kalau mau
Spoiler for open this:
for yang ga perlu:
Really Nice Performance IMO 
Applications:
Briefcase
Games
Internet Games
Pinball
Screensavers
Drivers:
Asynchronous Transfer Mode (ATM)
Display Adapters
Display Adapters (old)
IBM PS/2 TrackPoint
IBM ThinkPad
ISDN
Logitech WingMan
Microsoft SideWinder
Modems
Multifunctional
Printers
Scanners
Serial Pen Tablet
Sony Jog Dial
Tape drives
Toshiba DVD decoder card
Hardware Support:
ATM Support
Brother Devices
Gravis Digital GamePort
Iomega Zip drive
Multi-port serial adapters
Ramdisk
Windows CE USB Host
Multimedia:
AOL ART Image Format Support
Images and Backgrounds
Intel Indeo codecs
Media Center
Mouse Cursors
Movie Maker
Music Samples
Old CDPlayer and Sound Recorder
Tablet PC
Windows Media Player
Windows Sounds
Network:
Client for Netware Networks
Communication tools
Comtrol Test Terminal Program
Connection Manager
FrontPage Extensions
H323 MSP
Internet Connection Wizard
Internet Information Services (IIS)
IP Conferencing
MSN Explorer
Netmeeting
NetShell Cmd-Tool
Network Diagnostic
Peer-to-Peer
Share Creation Wizard
Synchronization Manager
TAPI Application Support
Vector Graphics Rendering (VML)
Web Folders
Windows Messenger
Operating System Options:
NET Framework
Blaster/Nachi removal tool
Color Schemes
Desktop Cleanup Wizard
Document Templates
DR Watson
FAT to NTFS converter
File and Settings Wizard
File System Encryption
Help and Support
IExpress Wizard
Manual Install and Upgrade
MS Agent
MS XML 2.0
Out of Box Experience (OOBE)
Private Character Editor
Remote Installation Services (RIS)
Search Assistant
Security Center
Service Pack Messages
Symbolic Debugger (NTSD)
Tour
Web View
Services:
Application Layer Gateway
Error Reporting
Indexing Service
Messenger
Network DDE
Remote Registry
Removable Storage
Route Listening Service
RPC Locator
Service Advertising Protocol
Simple TCP/IP Services
Telnet
Directories:
DOCS
SUPPORT
VALUEADD
Spoiler for open this:
for step 7:
step
Time to get Personal, Isi sendiri yah... keynya ngga saia kasih 
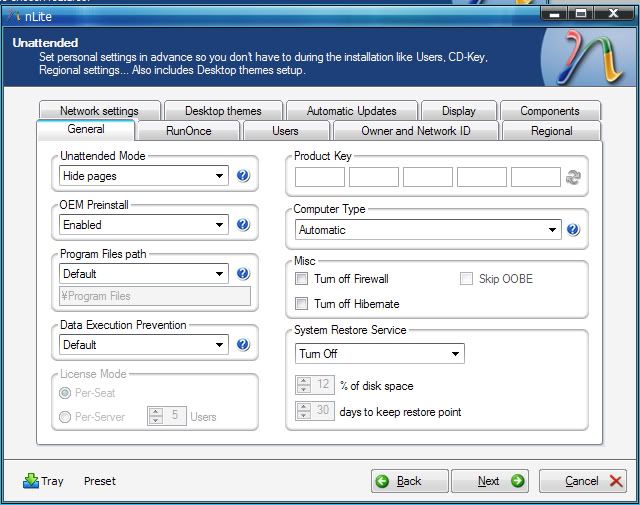
Dibagian Desktop Themes, add msstyles dari theme yg mau kamu integrasikan
Spoiler for open this:
for step 8:
step 8
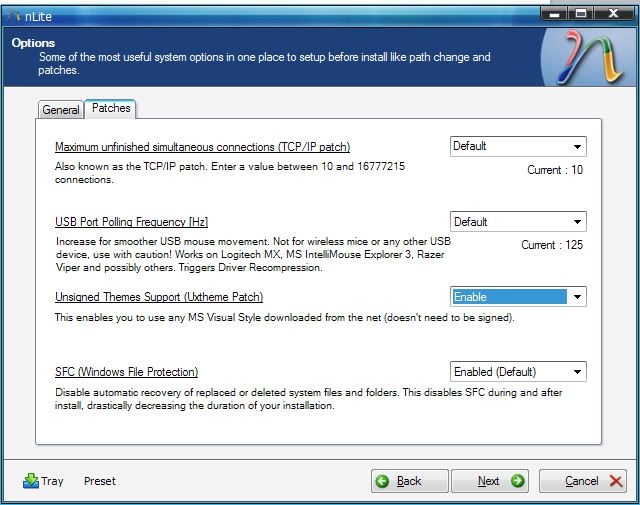
Bagian Ini yg penting cm di bagian patches,
pastikan enable di Uxtheme Patch kalau ngga theme yg tadi ga bakal ikut
Disable jg Windows SFC
Spoiler for open this:
for step 9:
step 9
Bagian Tweaks, centang terserah...
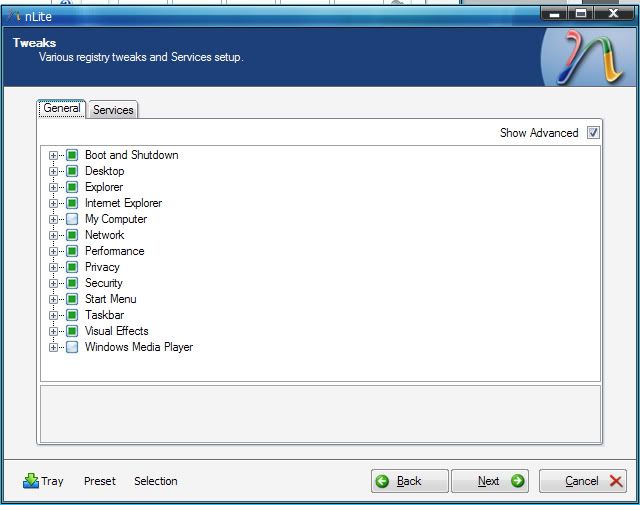
btw another nice performance, ikutin ini ajah
nice permormance pindah gan ntar ane lanjutin
ini lanjutannya gan
Spoiler for open this:
for step 10:
step 10
Tinggal proses windows versimu
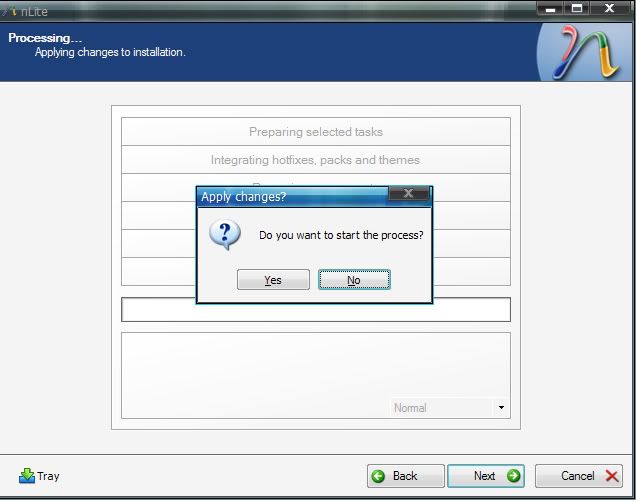
[spoiler=open this] for step 11:
Make Iso n burn, done
Segini dlu , ntar kalau ada kurang ditambahin
Selamat meracik windows 
yang suka bagi  dong
jangan 
bantu  ya gan
thanks all 
</div>

|


 Terkait


