Oke gan, ane mau ngasih step by step membuat vektor wajah pake Sotosop,
kira2 hasilnya seperti di atas..
ane pake Adobe Photoshop CS 5,
sbagai modelnya ane pake Leah Dizon
Spoiler for open this:
maaf kalo BWK
[/quote]
Quote:
STEP 1 :
Quote:
Spoiler for open this:
Spoiler for open this:
for Step 1:
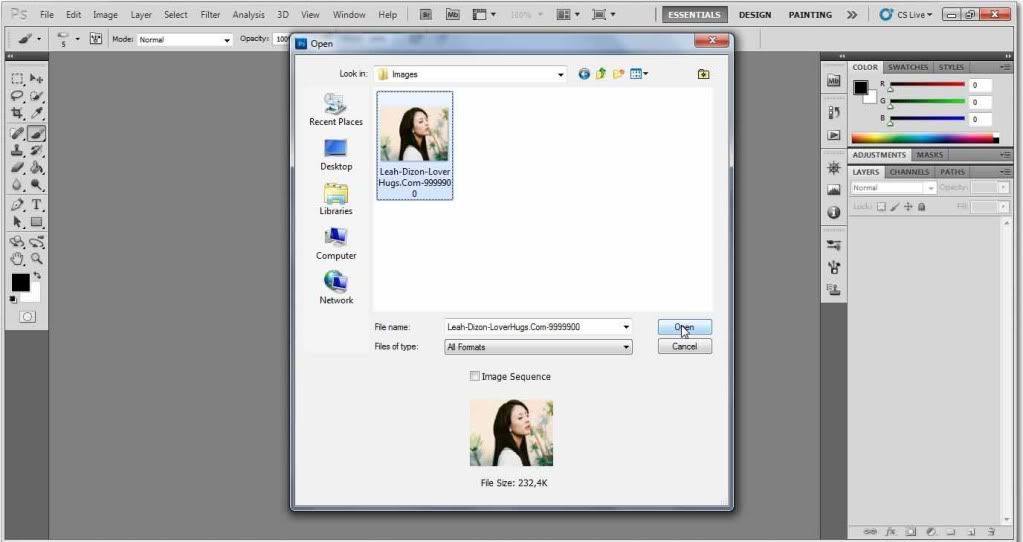
Buka foto yg mau diVektor (Ctrl+O)
Spoiler for open this:
Spoiler for open this:
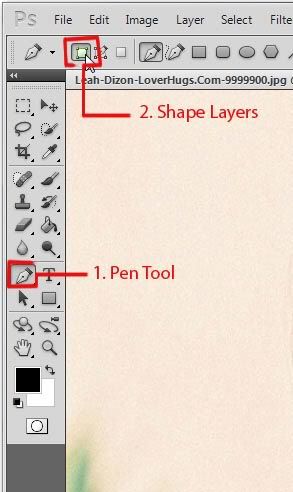
for 1:
Gunakan Pen Tool > Shape Layers
Spoiler for open this:
Spoiler for open this:
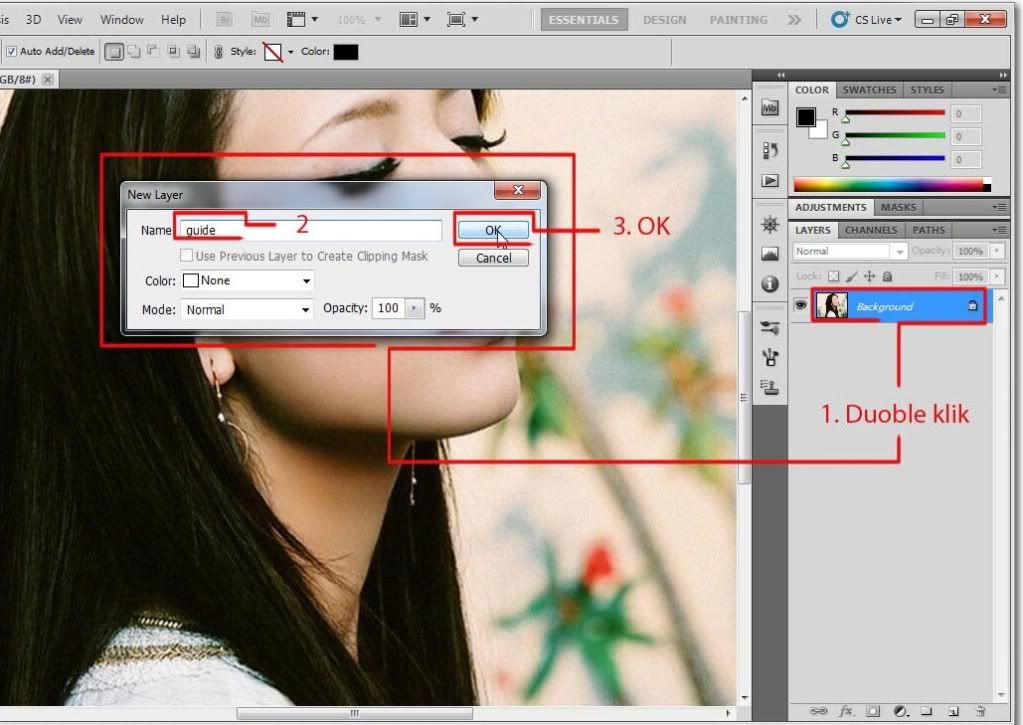
for 2:
Double Click Background untuk membuatnya menjadi Layer, lalu beri nama Guide(terserah mo dinamain apa aja ), trs klik OK
Spoiler for open this:
Spoiler for open this:
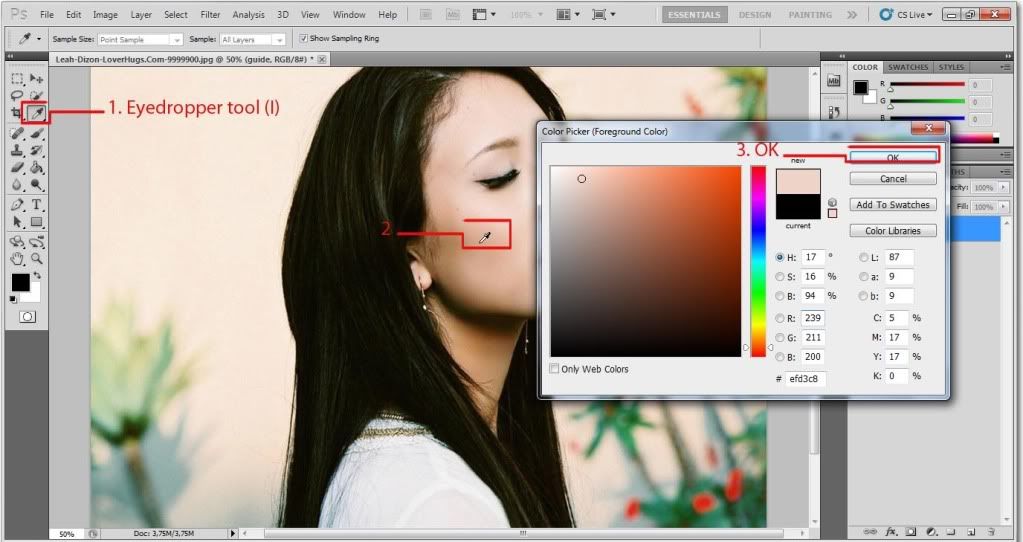
for 3:
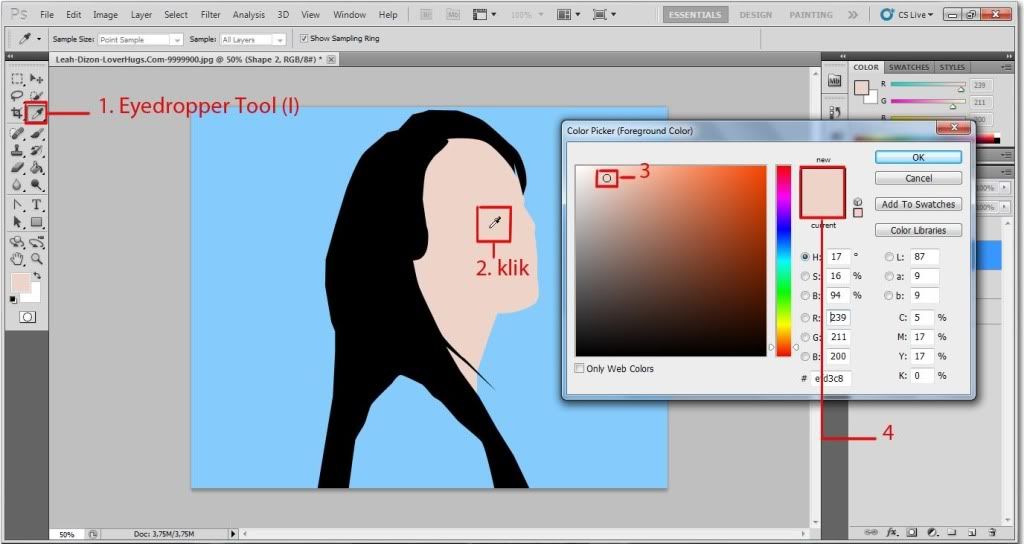
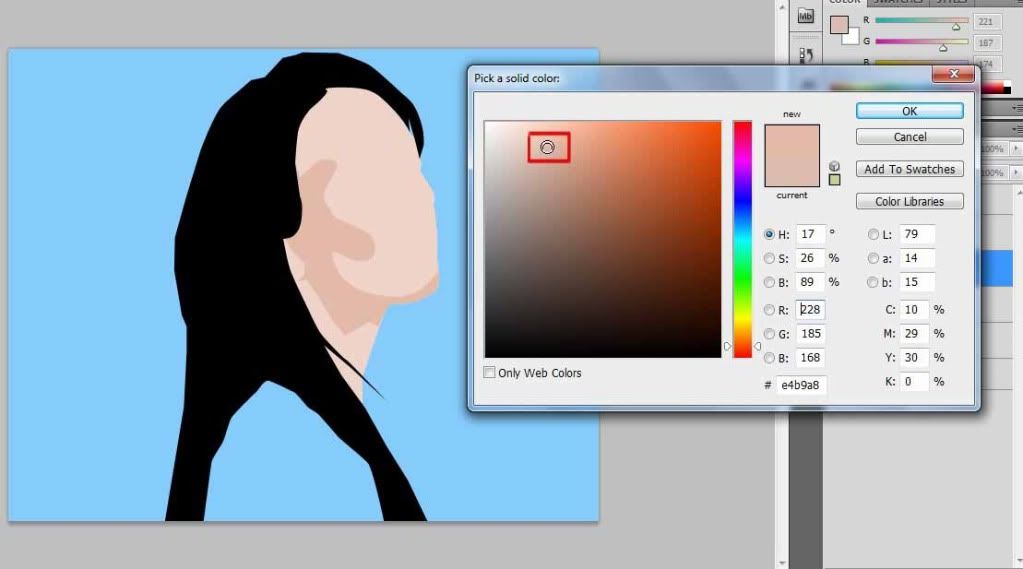
Gunakan Eyedropper Tool, klik bagian wajah, cari warna default dari wajah (untuk warna dasar), kalo udh pas, klik OK
Spoiler for open this:
Spoiler for open this:
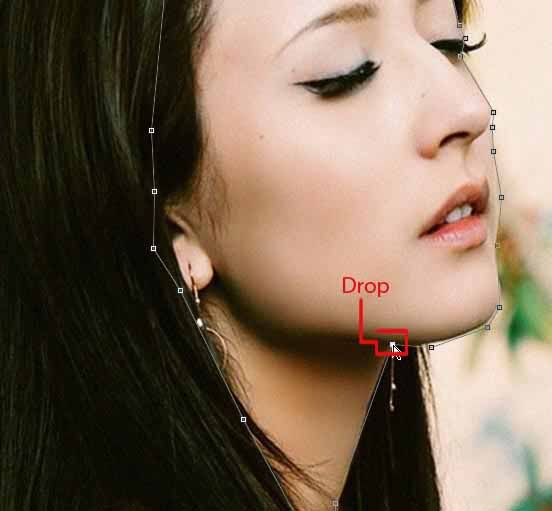
for 4:
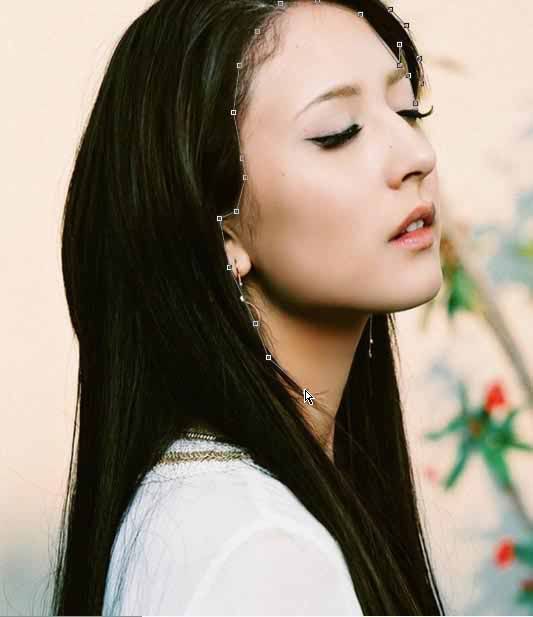
beri point di setiap sudut wajah menggunakan Pen Tool
Spoiler for open this:
Spoiler for open this:
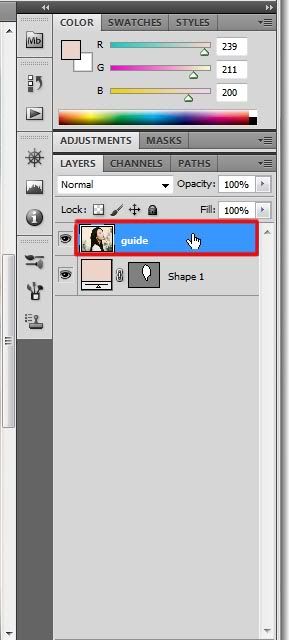
for 5:
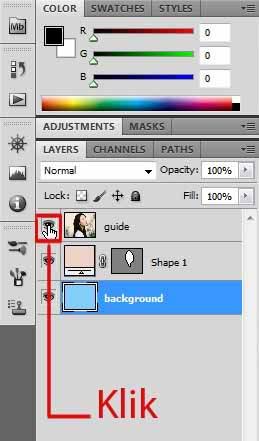
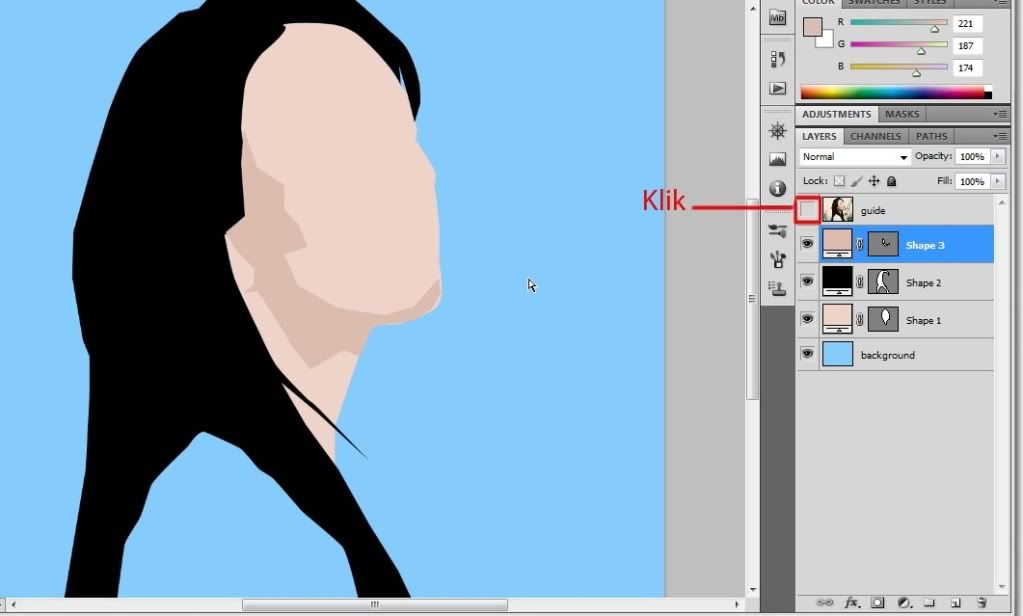
Pindahkan layer guide ke index yg paling atas, ini berfungsi sebagai panduan kita untuk melakukan masking, dan usahakan agar tetap berada di index yang paling atas sampai akhir
Spoiler for open this:
Spoiler for open this:
for 6:
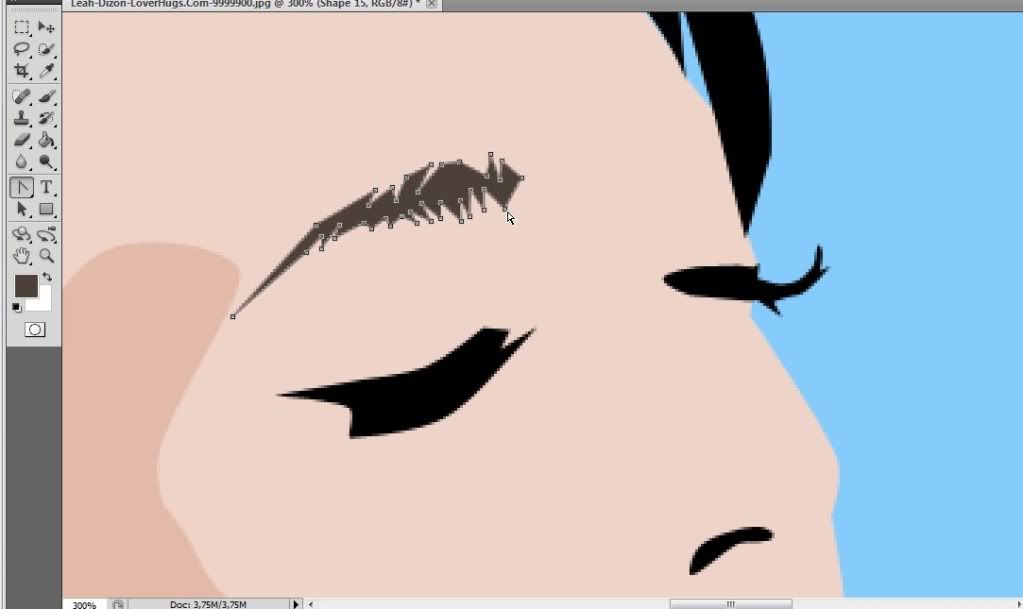
Gunakan Convert Point Tool untuk menyesuaikan sudut yang belum rapih
Spoiler for open this:
Spoiler for open this:
for 7:
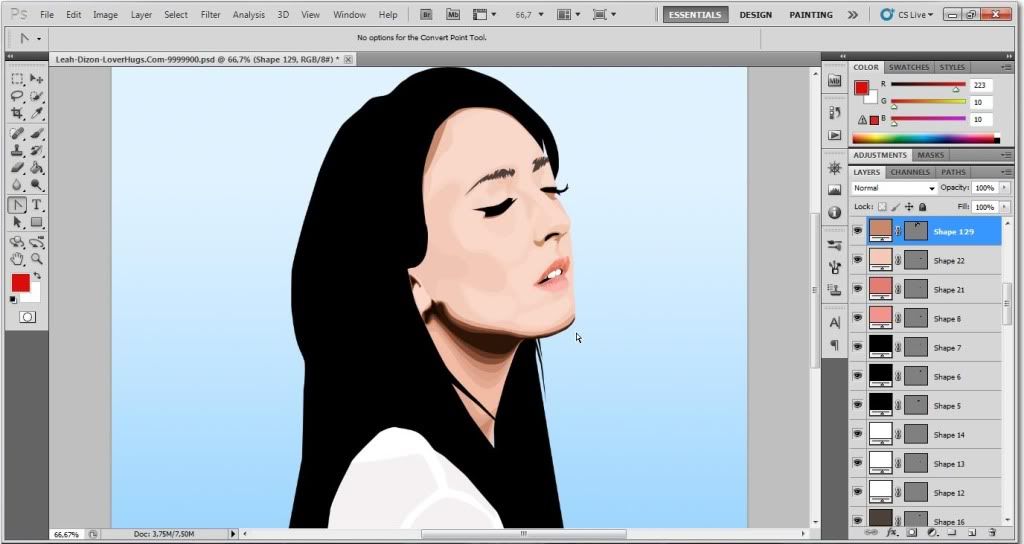
Klik bagian wajah
Klik Sudutnya agar Point-nya terlihat
Pindahkan Point yg belum pas sambil menahan (hold) Ctrl
Klik & geser Point (tanpa menekan Ctrl) untuk membuat sudut yg halus
Klik gambar mata pada layer guide untuk menyembunyikan layer guide agar dapat terlihat hasilnya.
Spoiler for open this:
Spoiler for open this:
for 8:
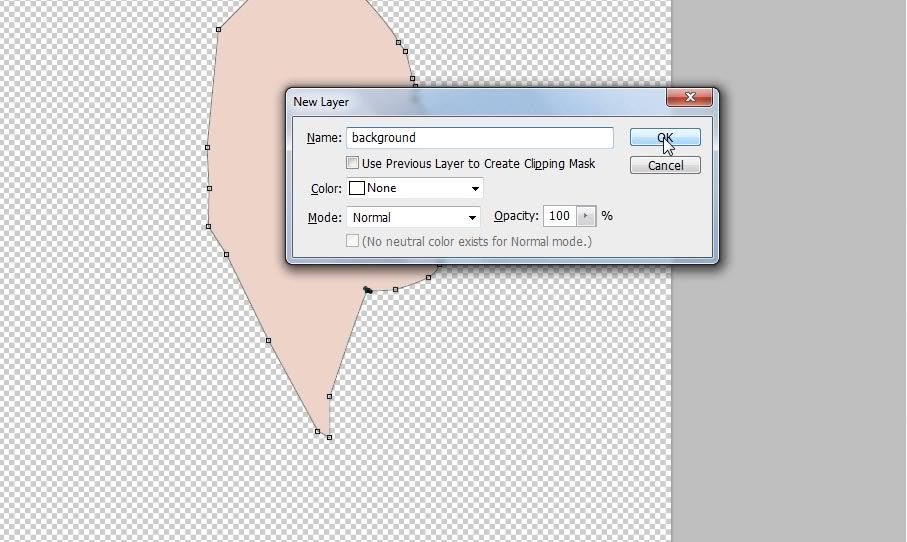
Buat Layer baru dgn menekan Ctrl+Shift+N dan beri nama background,lalu klik OK, untuk membuat background.
Spoiler for open this:
Spoiler for open this:
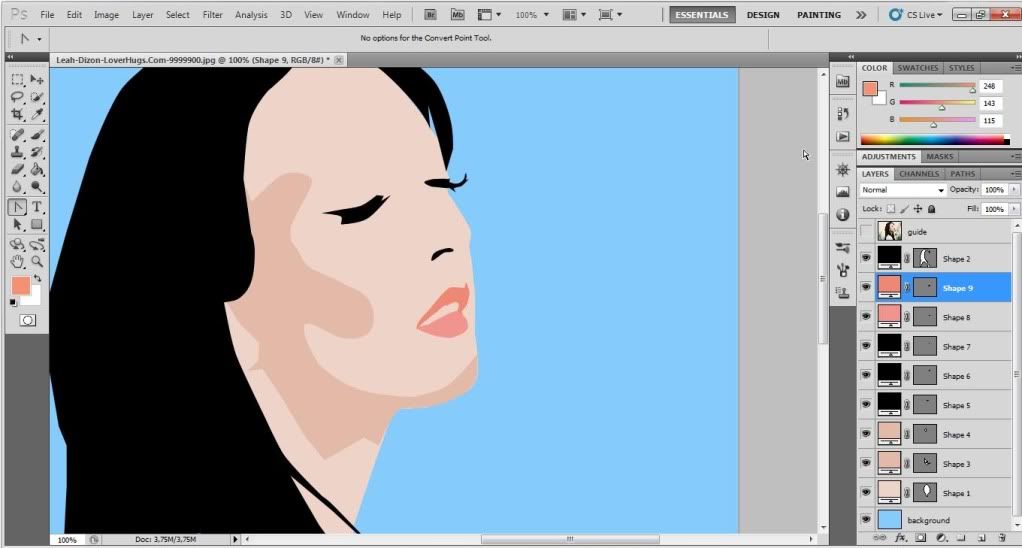
for 9:
Pindahkan layer background ke index yang paling bawah dan beri warna menggunakan Paint Bucket Tool
Spoiler for open this:
Spoiler for open this:
for 10:
STEP 2 :
Spoiler for open this:
Spoiler for open this:
for Step 2:
Gunakan lagi Pen Tool
Spoiler for open this:
Spoiler for open this:
for 1:
Klik gambar mata pd layer guide untuk menampilkan lg layer guide agar mempermudah proses masking
Spoiler for open this:
Spoiler for open this:
for 2:
Lakukan cara yg sma seperti saat masking wajah td, tapi kali ini masking dilakukan pada bagian rambut, (jangan lupa mengganti warna menjadi warna hitam terlebih dahulu)
Spoiler for open this:
Spoiler for open this:
for 3:
Kalo udah, hasilnya akan tampak seperti ini
Spoiler for open this:
Spoiler for open this:
for 4:
Rapihkan sudut2 point yg belum pas.
STEP 3 :
Spoiler for open this:
Spoiler for open this:
for Step 3:
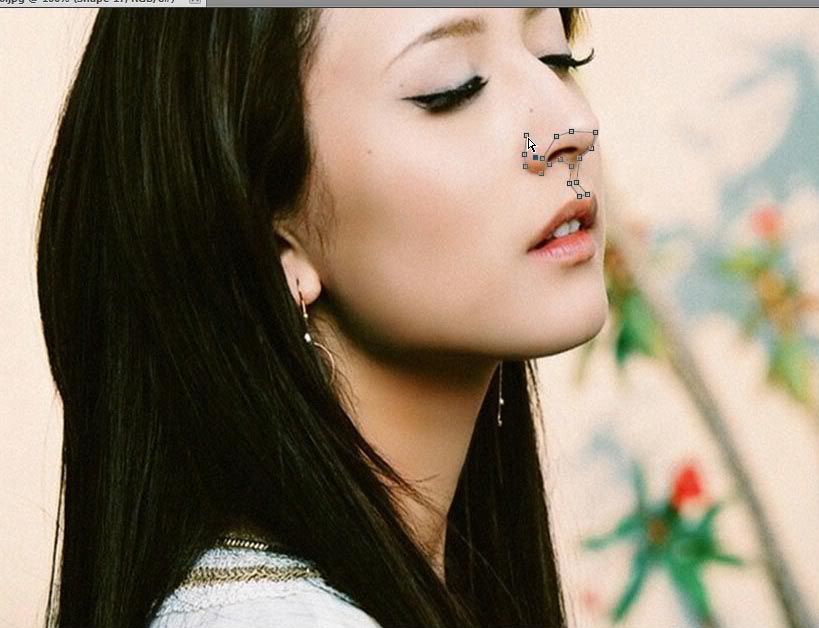
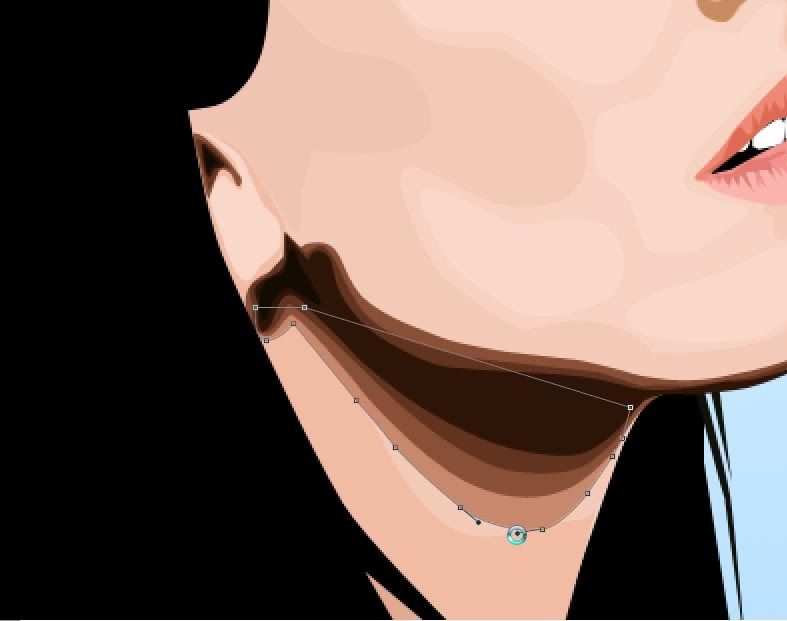
Klik Eyedrpper Tool, klik wajah yg udh dimasking, trs pilih warna yg lebih gelap, geser sedikit2 agar dpt menemukan warna shadow yg pas
Spoiler for open this:
Spoiler for open this:
for 1:
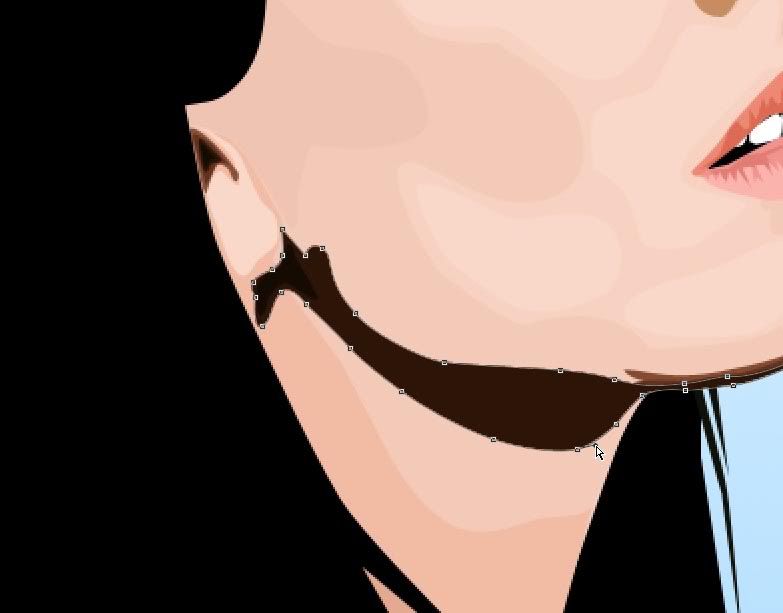
Lakukan masking pd bagian bayangan menggunakan Pen Tool
Spoiler for open this:
Spoiler for open this:
for 2:
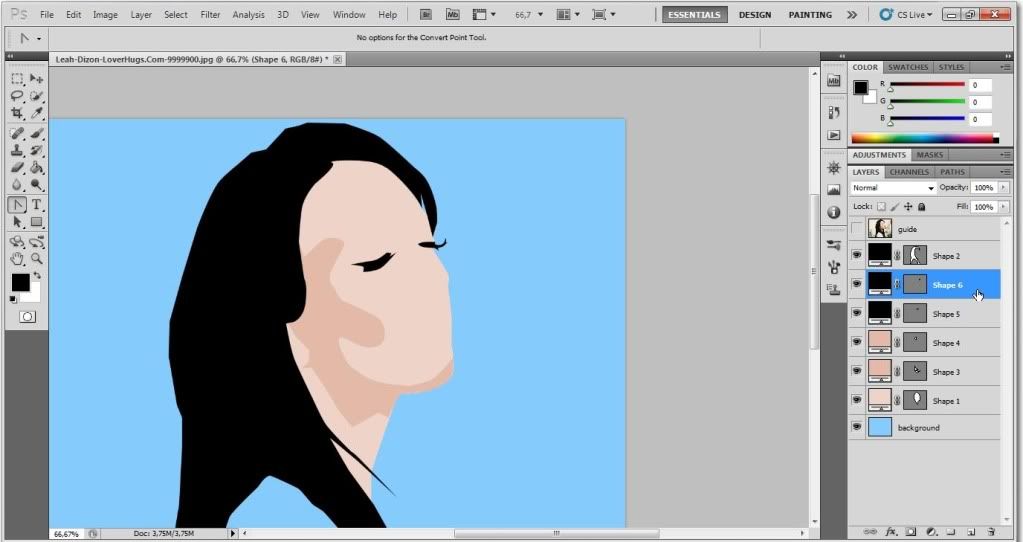
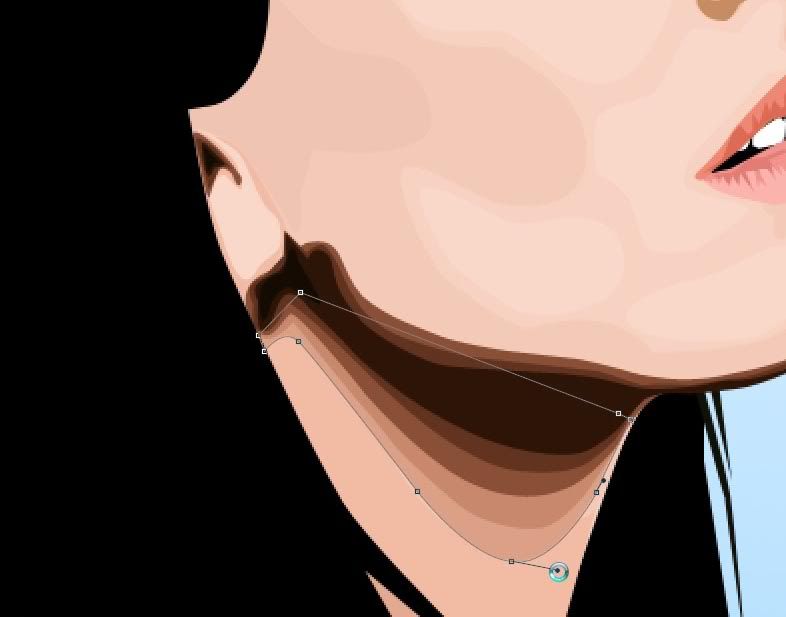
klo udh, kurang lebih jadinya gini.
Spoiler for open this:
Spoiler for open this:
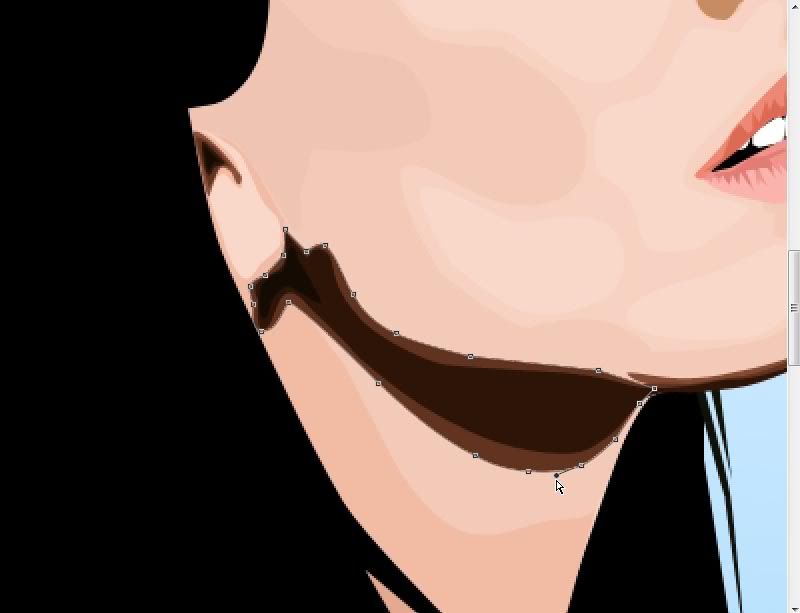
for 3:
haluskan sudut2 point menggunakan Convert Point Tool
STEP 4 :
Spoiler for open this:
Spoiler for open this:
for Step 4:
MENGUBAH WARNA SHAPES
Spoiler for open this:
Spoiler for open this:
for 1:
Double Click pd shapes yg ingin diubah warnanya.
Spoiler for open this:
Spoiler for open this:
for 2:
Pilih warnah sesuka hati anda
Spoiler for open this:
Spoiler for open this:
for 3:
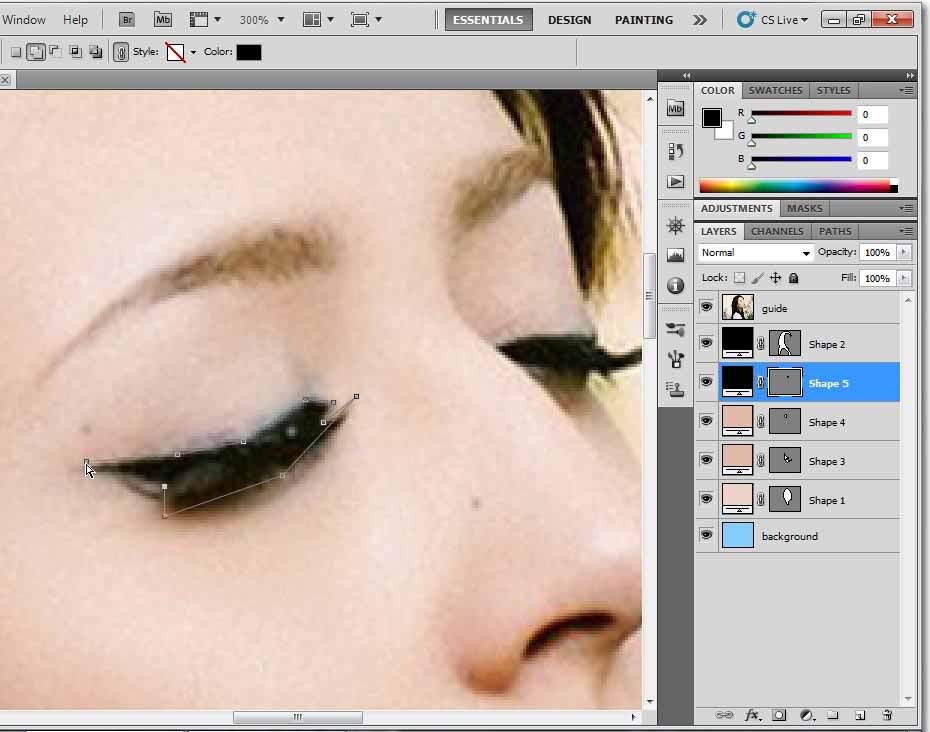
MASKING BULU MATA
Spoiler for open this:
Spoiler for open this:
for 4:
Set foreground color sesuai dgn warna bulu mata,
lalu lakukan masking seperti biasa
Spoiler for open this:
Spoiler for open this:
for 5:
Klo udh, jadinya gini.
Spoiler for open this:
Spoiler for open this:
for 6:
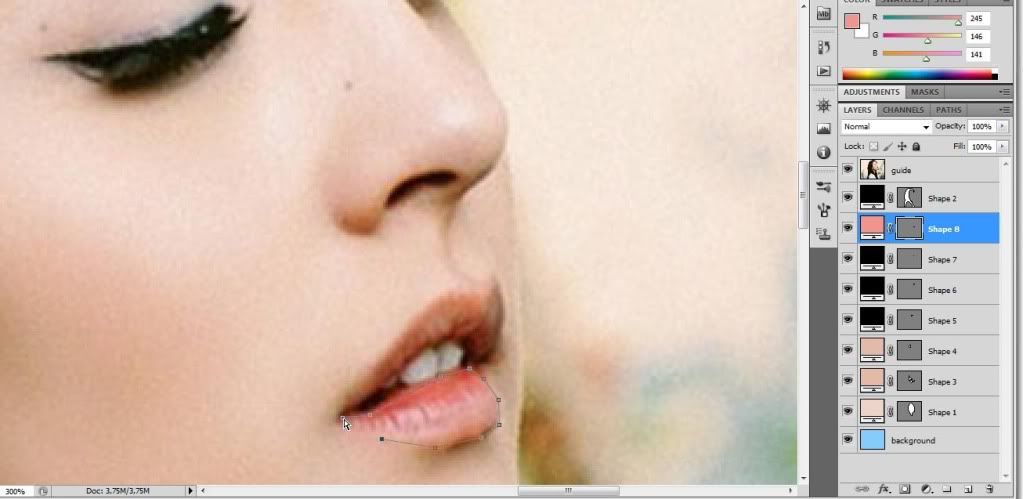
MASKING BIBIR
Spoiler for open this:
Spoiler for open this:
for 7:
Set foreground color sesuai dgn warna bibir
lalu lakukan masking seperti biasa
Spoiler for open this:
Spoiler for open this:
for 8:
Klo udh, jadinya gini.
Spoiler for open this:
Spoiler for open this:
for 9:
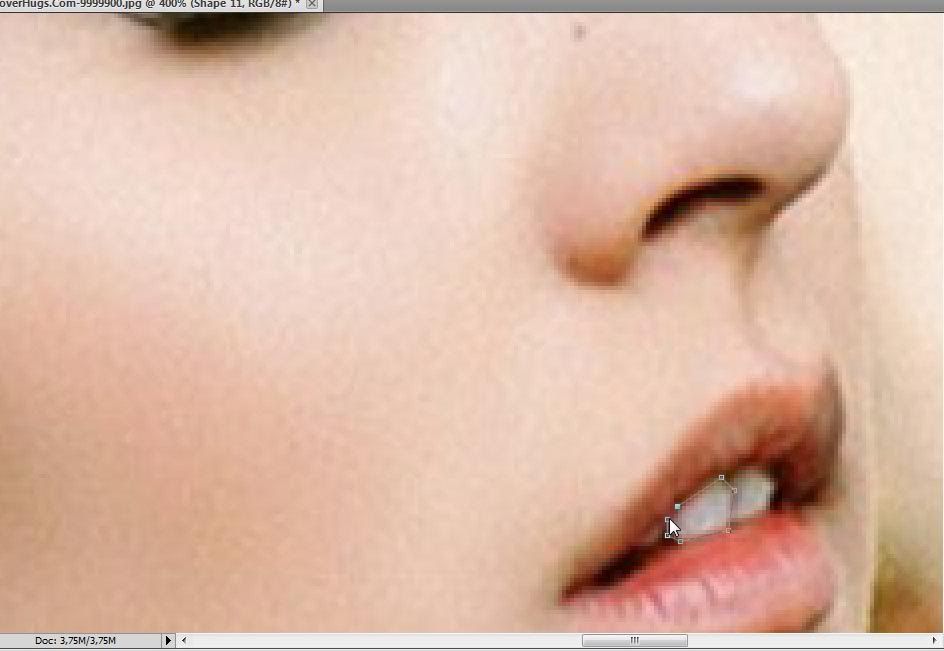
MASKING GIGI
Spoiler for open this:
Spoiler for open this:
for 10:
Set foreground color sesuai dgn warna gigi,
lalu lakukan masking seperti biasa
Spoiler for open this:
Spoiler for open this:
for 11:
Klo udh, jadinya gini.
Spoiler for open this:
Spoiler for open this:
for 12:
MASKING ALIS
Spoiler for open this:
Spoiler for open this:
for 13:
Set foreground color sesuai dgn warna alis,
lalu lakukan masking seperti biasa
Spoiler for open this:
Spoiler for open this:
for 14:
STEP 5 :
Spoiler for open this:
Spoiler for open this:
for Step 5:
Pada langkah ini, sangat dibutuhkan KESABARAN & KETELITIAN,
coz ini bagian tersulit (kalo bagi ane gan)
oke, langsung aja.
tips : set warna dr yg paling gelap
Spoiler for open this:
Spoiler for open this:
for 1:
Spoiler for open this:
Spoiler for open this:
for 2:
Spoiler for open this:
Spoiler for open this:
for 3:
Spoiler for open this:
Spoiler for open this:
for 4:
Spoiler for open this:
Spoiler for open this:
for 5:
Spoiler for open this:
Spoiler for open this:
for 6:
Spoiler for open this:
Spoiler for open this:
for 7:
Spoiler for open this:
Spoiler for open this:
for 8:
MISI 5 SELESAI
Spoiler for open this:
Spoiler for open this:
for 9:
STEP 6 :
Spoiler for open this:
Spoiler for open this:
for Step 6:
Sama seperti step 5, step ini sangat membutuhkan KESABARAN dan KETELITIAN
tips : lakukan masking pada setiap alur rambut yg berbeda sebagai patokan.
Spoiler for open this:
Spoiler for open this:
for 1:
Spoiler for open this:
Spoiler for open this:
for 2:
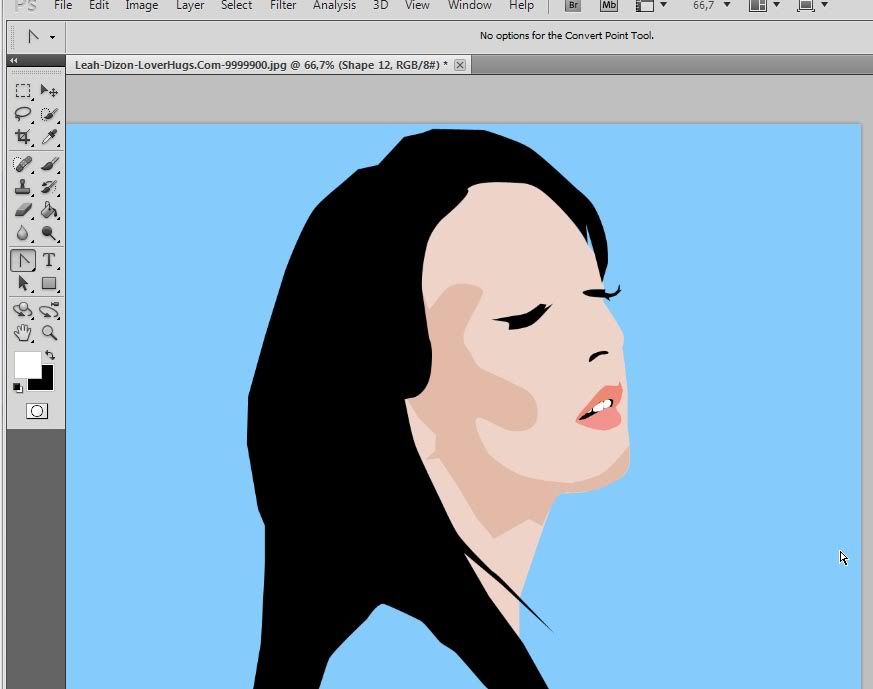
AKHIRNYA, PROSES MASKING PUN SELESAI
ini dia penampakannya
Spoiler for open this:
Spoiler for open this:
for 3:
FINAL STEP :
Spoiler for open this:
Spoiler for open this:
for FINAL:
Beri polesan terakhir
contoh : beri brush, water mark, dsb.
hasil akhirnya seperti di atas, selamat mencoba
tambahan dari agan monsteronabox untuk Step 6
Spoiler for open this:
Spoiler for open this:
for :
Spoiler for open this:
Quote:
Originally Posted by monsteronabox
keren gan,
makasih buat tutorialnya, ane ikutan nimbrung gan ya,


 27th May 2012


 Silahkan diklik gambarnya


 ), trs klik OK